
Low Density Hair Topper
What To Do If Your Hairpiece If It Is Too Dense!
HOW TO: LOW DENSITY HAIR TOPPER - Table of Contents
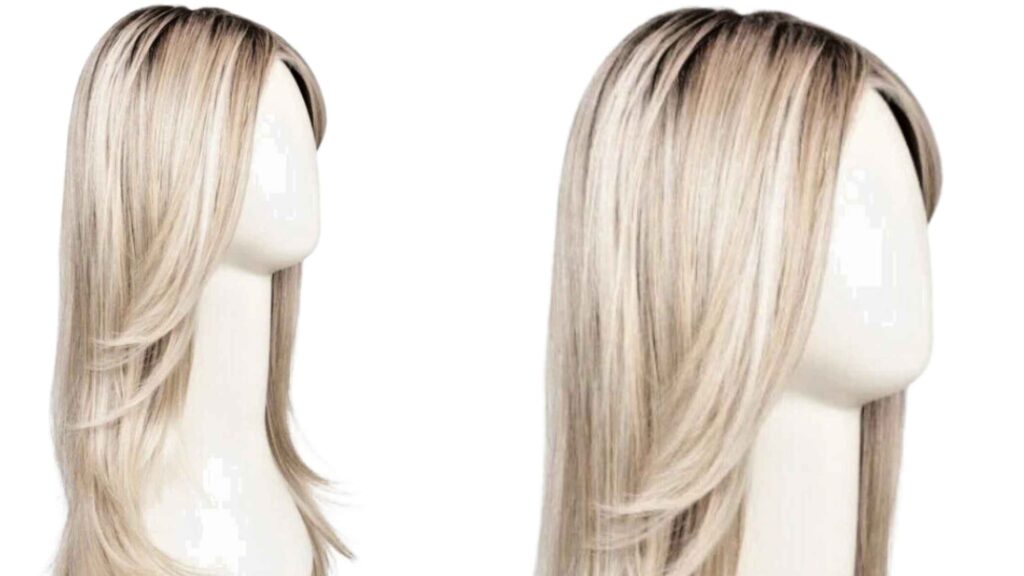
Density Matters!
When it comes to wigs and toppers, one of the primary factors that can make them look fake is their density or thickness. The right density for you depends on your facial features and personal style. If you have smaller features like a petite face and head circumference, opting for a wig or hair topper with too much hair can make it appear artificial. Strive for a thickness that resembles a natural head of hair but with a touch of added volume.
For example, human hair wigs often mention their density, such as 130%, 150%, or even 180%. Choose a density that complements your overall look.
When it comes to toppers I like a low density topper, and I personally prefer densities between 120% to 130% for a natural appearance.
If your Human hair topper (or wig) is too dense, don’t worry, in this article, we’re going to check out how easy is to thin out a human hair topper or wig.
Don’t be scared, if you just work it out slowly you will achieve your desired look without compromising the integrity of your hairpiece. Let’s get started!
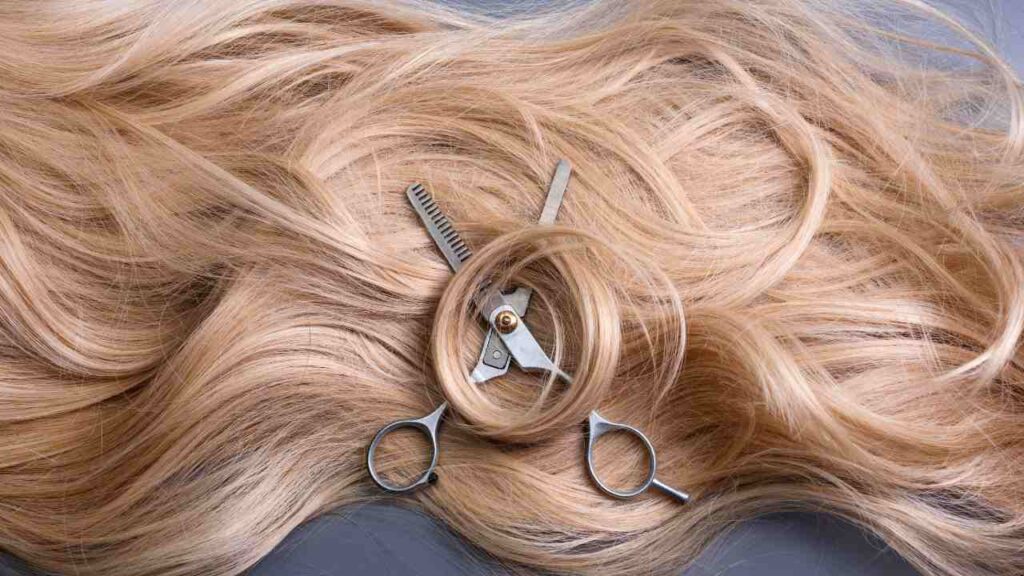
Step 1: Get the Basics
Before we jump into thinning that topper, make sure you have your workspace set up right. You’ll need:
- A canvas headstand
- Shearing scissors
- A nail scissors
- A fine-toothed comb

Step 2: Choose Your Thinning Method
Now, there are a few ways to thin out your hairpice.
Here are the top three methods to achieve a low density topper (or wig):
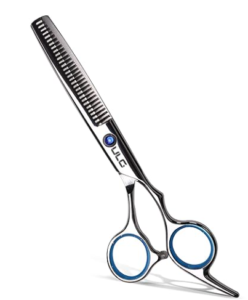
- Method 1: Shearing Scissors: These are the real deal for thinning out hairpieces. They give you precision control, perfect for trimming the topper without leaving it looking patchy.
- Method 2: Nail Scissors: If you’re looking for a more gradual thinning effect, nail scissors can be your jam. They’re great for those fine-tuning touches.
- Method 3: Pulling Hairs from the Weft: This one’s all about plucking out individual hairs from the weft of the topper. It’s meticulous work but can give you a killer result.
BEFORE YOU START!
Avoid using thinning scissors directly on the silk top as it may result in an uneven appearance. Instead, thin it out by gently pulling out individual strands from the area where the silk top is situated. Using scissors can cause small hairs to protrude, creating an undesirable and uneven look. To achieve a more even and natural thinning effect, it’s best to selectively pull hairs from the top.
Step 3: Begin Thinning For a Low Density Hair Topper
Start by ensuring your topper is securely placed on a canvas headstand or worn by someone who can assist you. It’s crucial to work methodically and avoid rushing through the process.
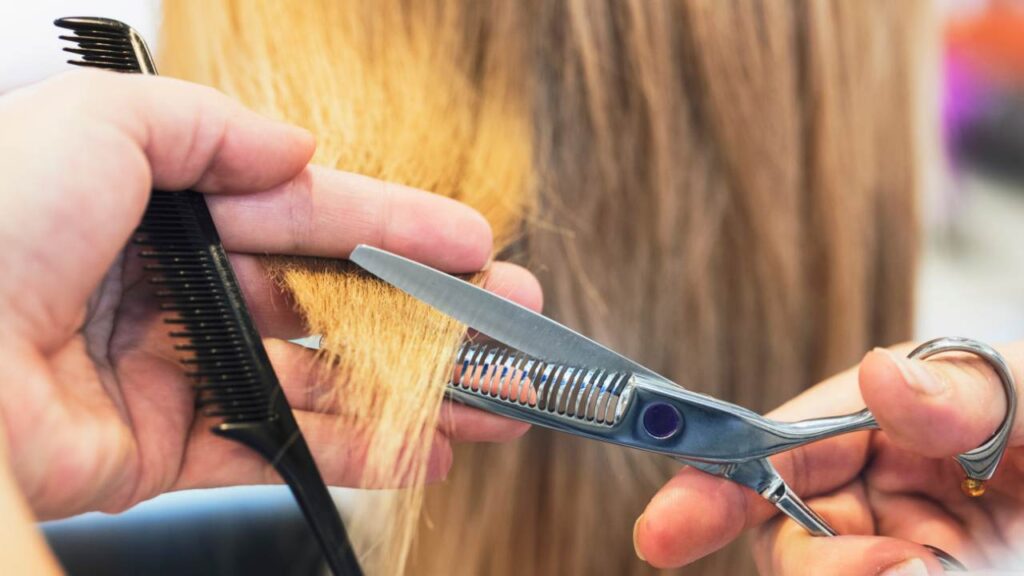
If you’re using shearing scissors (Method 1)
- Be cautious not to thin out too much in one go. Start by taking small sections and working from the back towards the front.
- Use the shearing scissors to trim away a few strands at a time, focusing on the areas that require thinning the most.
- Comb through the hair frequently to assess the progress and ensure an even distribution.
- Avoid thinning too close to the weft or the back to prevent bald spots.
If you’re using nail scissors: (Method 2)
- Nail scissors are handy for fine-tuning and adding subtle layers. Use them sparingly to trim individual hairs as needed.
- Take your time and avoid cutting too close to the base!
If you’re pulling hairs from the weft: (Method 3)
- This method involves gently tugging on individual hairs from the weft of the topper. Be patient and systematic.
- Start by identifying the areas where you want to reduce bulk or create a more natural look.
- Using a fine-toothed comb, isolate individual hairs from the weft and pull them out carefully. Avoid pulling too hard to prevent damage.
Step 4: Checking Your Progress
Regularly check the thinning progress by combing through the topper and assessing its appearance. Remember, it’s easier to remove more hair later than to add it back, so take your time and proceed gradually.
Step 5: Final Touches
Once you’re satisfied with the thinning results, style the topper as desired. You can part it in the center, on the side, or style it to your preference. Remember that different parts may require different levels of thinning, so adjust accordingly.
PRO TIPS
1.These methods work well for human hair toppers but be careful when thinning a full wig, as it’s more intricate. You can either thin it strand by strand using small scissors or even remove some wefts for a quicker solution. The key is to go slowly to avoid over-thinning.
2. If your hair topper is intended for a middle part, focus on thinning from the top’s center, taking care not to thin the sides too much in case you will want to style it with a side part later.
3.When placing your hair topper on the mannequin head, avoid poking the silk top with the T-pins meant for holding on the canvas. Instead, insert the pins by the seam, clips or the wefted areas.
Conclusion: Achieving A Low density Topper Is Possible!
Thinning out a human hair topper is a skill that can greatly enhance its appearance and make it more comfortable to wear. By following the method that suits you best and working meticulously, you can achieve a natural, flattering look that boosts your confidence.